Baseball gloves are essential for players. They protect people and help with performance. Knowing how to replace one is important for keeping it in good condition.
Research and choose a glove that suits you. Look at factors like position-specific gloves, size, material, webbing style, pocket depth, and break-in period. The right glove will help you be comfortable and catch well.
Pro Tip: Ask experienced players or professionals for help. Their knowledge can help you pick one based on your playing style and needs.
Leave your sewing skills at home. You just need simple tools to make your glove look great.
Tools Needed for Re-lacing a Baseball Glove
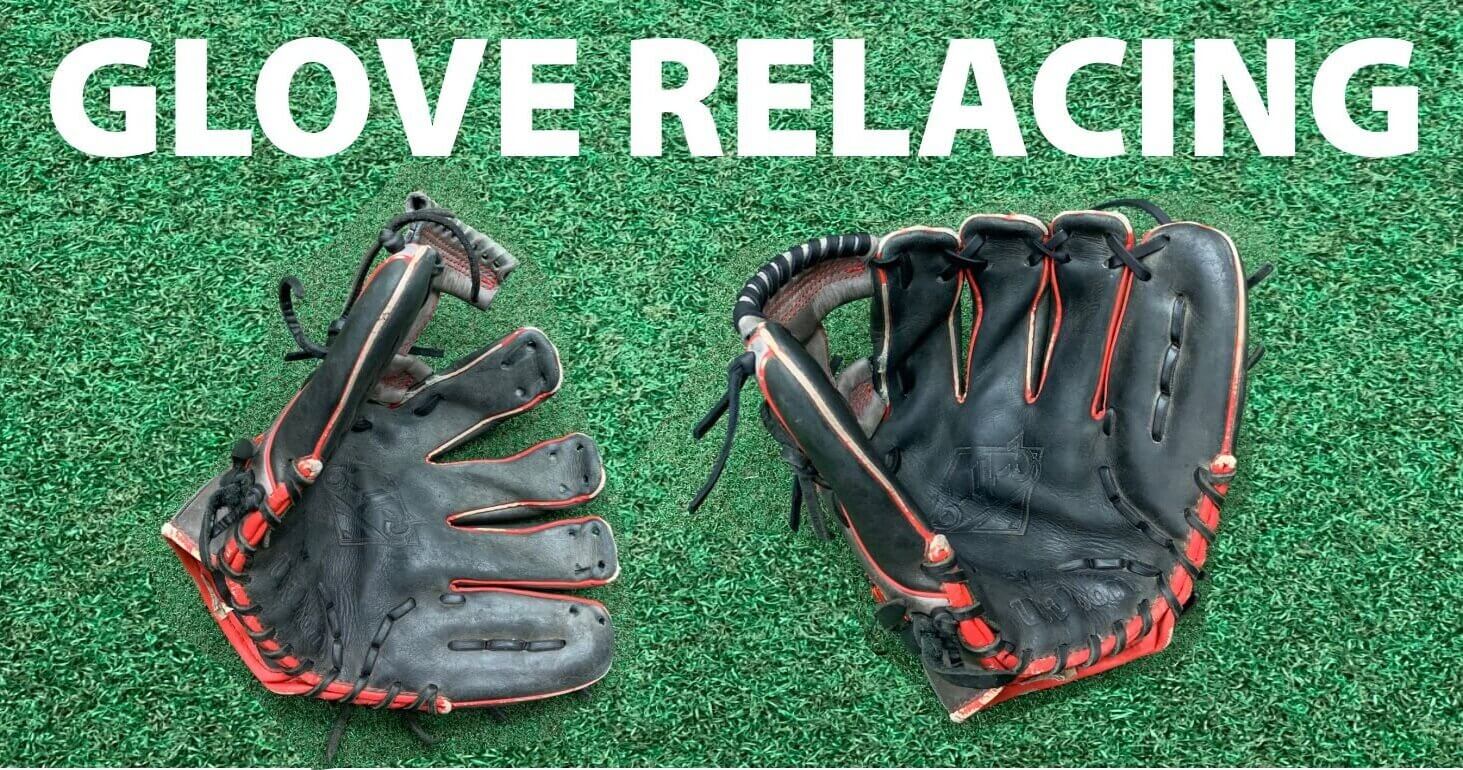
Re-lacing a baseball glove necessitates particular tools to make sure success.
Here are 3 essential tools you need:
- Leather laces: Crafted from high-quality leather, these laces offer durability and strength for the game.
- Lacing needle: This unique needle allows precise threading and guarantees each stitch is secure.
- Awl or leather punch: This tool makes small holes in the leather, allowing for easy insertion of the laces.
Apart from these basic tools, there are some individual details worth noting. For instance, the color of the lace. Although black is common, many players prefer colored laces to add their own touch to their gloves. Also, the tension when re-lacing is significant. The laces should be tight enough to provide structure and stability, but not so tight that it restricts flexibility.
To get ideal results when relacing a baseball glove, here are some tips:
- Use waxed thread: Waxed laces supply increased grip and durability, making sure your newly relaced glove will last through lots of games.
- Stick to a pattern: Start at one end of the glove then work around in a consistent pattern. This keeps uniformity and guarantees all areas are properly secured.
- Take your time: Rushing can cause mistakes or sloppy stitching. Dedicate enough time and attention to detail for a neat re-lacing job.
By following these tips, you can enhance your performance on the field while prolonging the lifespan of your beloved baseball glove. So, get your tools and get ready to give your glove a much-needed makeover!
Preparing the Glove for Re-lacing

Clean the glove with a soft brush or cloth and identify any areas that need repair. Thoroughly inspect for signs of wear and tear like loose threads, torn leather, or broken laces.
Carefully cut the old laces off with a leather punch or knife, noting the pattern of the original lacing system. Measure and cut new laces that are suitable in length and thickness for your glove model.
Mark anchor points to guide your re-lacing process and maintain tension. Stretch and condition the glove for flexibility and natural feel.
Remember to be patient and handle each step with care. Relacing a baseball glove can bring back cherished memories. Embrace this opportunity to revive your beloved glove with care and reverence, knowing that each delicate step is a testament to your commitment to the sport.
Get ready to makeover your glove!
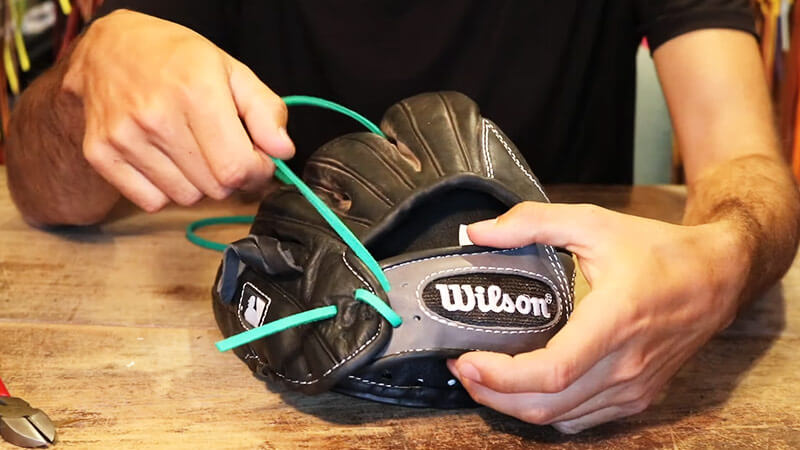
Removing the Old Laces
- Examine the existing laces. Check for any worn or damaged areas. This will tell you what to get rid of and replace.
- Start from one end. Loosen and remove the knot. Pull gently on the lace to untie knots as you go towards the other end.
- Remove the laces. Slide them out through each hole in the glove. Make sure all remnants of the old lace are gone.
- Handle laces carefully, to avoid damaging the glove or the laces.
Did you know? Baseball Prospectus says proper maintenance of a glove extends its life and improves performance.
Finding replacement laces is like finding a unicorn. Rare, but when you do, it’s magic on the field.
Choosing the Right Replacement Laces
- Opt for high-quality leather laces.
- Measure the length, or refer to manufacturer’s guidelines.
- Consider the thickness for your preference and grip.
- Choose a color that suits your style.
- Look for reputable brands.
- Don’t forget to consider budget and quality.
Pro tip: Clean and condition your glove for optimal performance.
Re-lacing requires patience, steady hands, and a lot of swear words.
Starting the Re-lacing Process
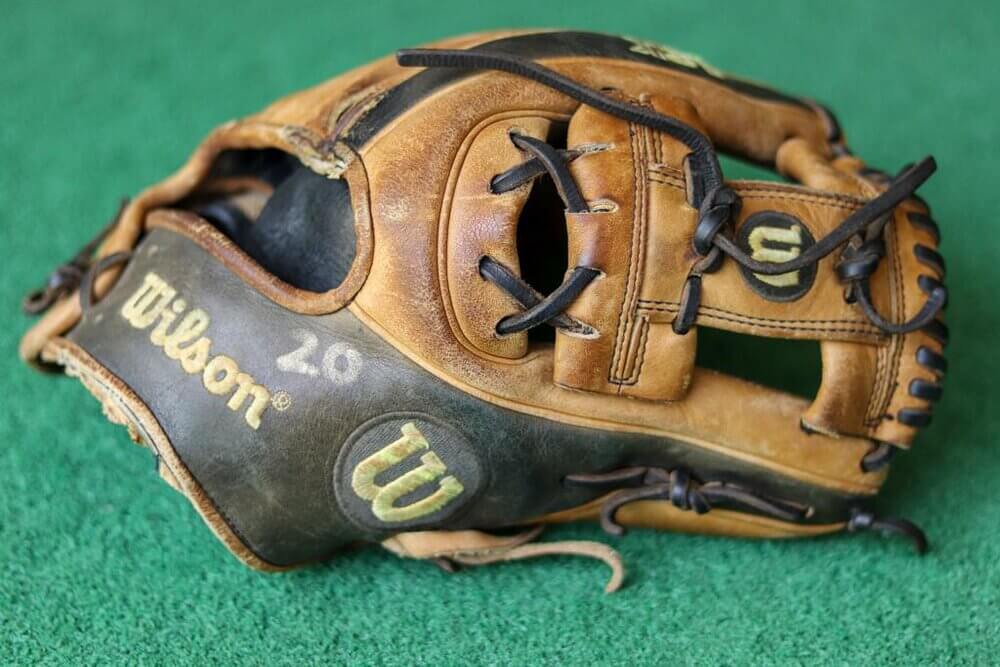
- Cut or remove the existing laces using scissors or a utility knife. Take care not to damage the leather.
- Clean the glove with a mild soap and warm water solution. Gently scrub with a soft brush or cloth, particularly around the lace holes.
- Measure and cut the new lace. Make sure it’s long enough to thread through all the holes and leave a bit extra for tying knots.
- Start lacing by threading one end of the lace through a bottom hole on the backside of the webbing. Pull it tight, leaving 1 inch of excess lace on both sides.
- Move up diagonally across the webbing, looping the lace through each hole until you reach the top. Ensure each stitch is secure and pulled tightly.
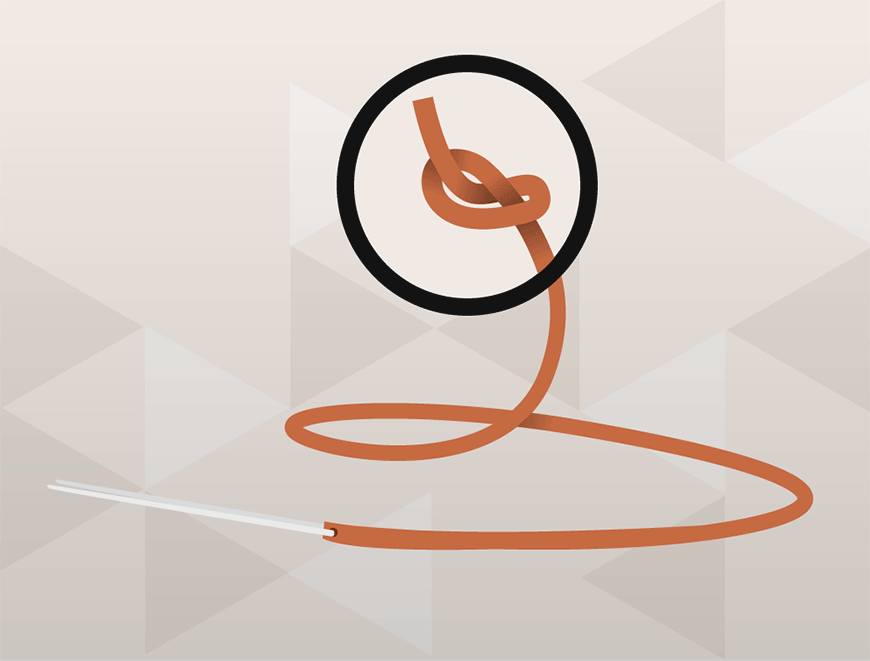
- Tie off any loose ends with a tight knot, then trim any excess lace. Leave enough for adjustment if needed.
Remember: Practice makes perfect when it comes to relacing gloves! Don’t be discouraged if it takes a few tries to get it right. Grab your tools and get started! Revitalize your trusty companion before game day! Lace the webbing – it’s like stitching together a friendship, but with less emotion and more leather.
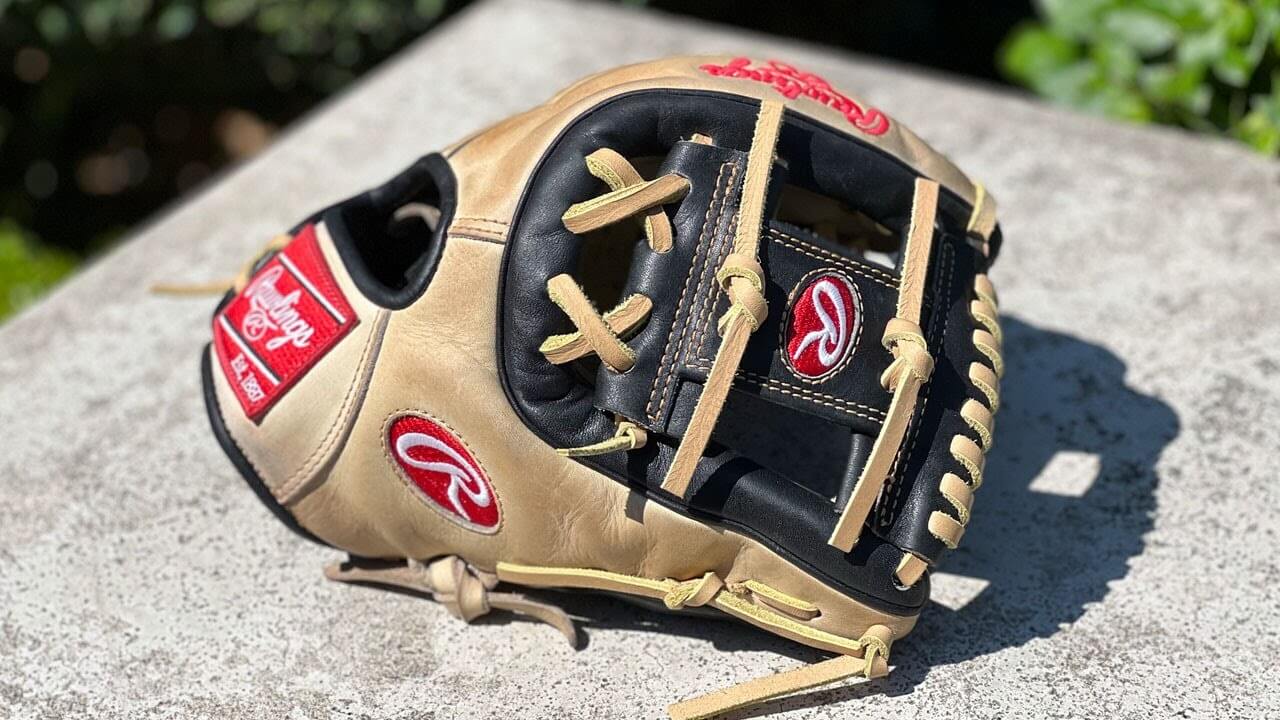
Lacing the Webbing
- Thread one end of the lace through the first top hole of the webbing. Leave equal length of lace on both sides.
- Take the other end and go over and under the existing laces in the next hole. Do this until you reach the last hole.
- Securely tie the ends with a double knot and trim any excess.
Different techniques and patterns are available to suit your preferences or specific needs. Experiment with styles to customize your glove. To get better results, use waxed or pre-stretched lace. It’s more resistant to stretching. Apply tension evenly, so each loop is tight for uniformity and no weak spots. Use different colors for a cool look.
By following these tips and techniques, relace your baseball glove’s webbing. Give it a new look and improved performance. Take your time and have fun as you bring back your faithful companion.
Lacing the Fingers and Thumb
Lace up that baseball glove! Follow these steps for the perfect tie:
- Start by threading the lace through the first hole of the finger or thumb. Leave a tail on the outside.
- Take the lace diagonally across to the next hole. Thread it from inside to out.
- Keep going diagonally until the last hole.
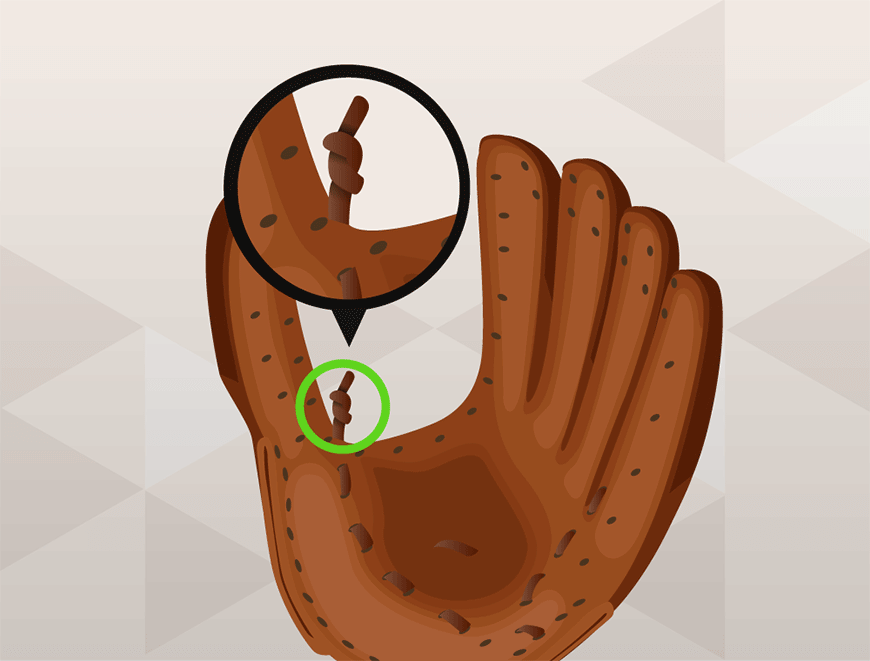
- Once you reach the last one, loop the lace around itself to create a knot. That’ll stop it from coming undone during use.
- Repeat for the other fingers and thumbs. Keep the tension in the lacing even.
- Double-check all the knots are secure and tight.
There are different styles of lacing patterns to choose from. Try some different ones to find your comfort and performance preferences.
For extra durability and tension, use waxed laces.
Now, get ready for action on the field – don’t let loose laces catch you off guard!
Tying off The Laces
- Start by threading one end of the lace through the first hole on the glove’s outer edge. Pull until both lengths are the same.
- “X” it up – cross the two ends of the lace and thread them through the second hole.
- Crisscross the laces, alternating which one goes over and under, as you go through each hole.
- Pull the laces tight before the last few holes to secure the glove tightly around your hand.
- Tie a double knot with the laces in the final hole to keep them from coming undone.
- Snip off the extra lace, leaving enough to maintain a secure knot.
For best results, follow these tips:
- Get laces that are strong and resistant to wear.
- Apply some leather conditioner or oil to the laces to keep them supple.
- Take your time when tying off the laces for a tight, secure fit for maximum control and comfort.
By following these guidelines, your baseball glove laces will be securely tied and your glove ready for peak performance! Finally, put it to the test – catch a fastball with your face!
Testing the Newly Re-laced Glove
To keep your re-laced baseball glove in shape, follow these 5 steps:
- Inspect the laces. Look for tight knots and even spacing. This’ll help avoid problems during play.
- Flex the glove. Squeeze and flex it gently to test its flexibility. It should be easy to move without feeling stiff. If it is, condition it with a leather softener.
- Test the padding. Put your palm in the pocket, and check for cushioning and support.
- Test the finger mobility. Move each finger in the stalls to ensure easy movement. Critical for accurate fielding.
- Ball retention test. Insert a ball into the pocket, close it, and give it a firm shake. It should stay put.
Plus, keep your glove clean with a mild soap solution and conditioned with a leather conditioner. For the best performance, break it in by opening and closing it with both hands. A well-maintained glove will help you steal the show from the outfield!
Tips for Maintaining a Re-laced Baseball Glove
Keep your baseball glove in top shape by following these tips:
- Clean regularly with a damp cloth. Avoid harsh chemicals.
- Apply leather conditioner to keep it supple. Follow manufacturer instructions.
- Store in a cool, dry place. Keep away from extreme temperatures and direct sunlight.
- Break in gradually. Avoid excessive force or bending.
- Develop a maintenance routine. Repair any issues promptly.
Be sure to consult the manufacturer’s guidelines specific to your model for additional instructions. Customize your glove with color choices and pattern variations. Professional re-lacing services are recommended for complex repairs.
A well-laced glove will give you better control and grip on the field, which will enhance your performance. So, lace up and get ready for a fresh catch!
Frequently Asked Questions
Q: How often should I relace my baseball glove?
A: It really depends on how frequently you use your glove and how well you take care of it. A good rule of thumb is to check your glove once a year and replace any worn or broken lace.
Q: What kind of lace should I use to re-lace my baseball glove?
A: It’s recommended to use high-quality leather lace. The thickness of the lace depends on the size of your glove and your personal preference.
Q: What tools do I need to re-lace my baseball glove?
A: You will need a lace cutter, a leather punch, a small Phillips head screwdriver or awl, and a needle-nose pliers.
Q: How do I know where to start re-lacing my baseball glove?
A: Start at the top of the webbing and work your way down the fingers. There is usually a pattern to follow, but if you’re unsure, take a photo before you take out the old lacing.
Q: How do I maintain my re-laced baseball glove?
A: Keep your glove clean and dry, and avoid leaving it in direct sunlight or extreme temperatures. Apply leather conditioner periodically to keep the leather supple and prevent cracking.
Q: Can I re-lace my baseball glove myself even if I have no experience?
A: Yes, re-lacing your baseball glove can be done by anyone with a bit of patience and attention to detail. It may take some time, but it’s a relatively straightforward process, and there are plenty of tutorials available online.
Conclusion
Relacing a baseball glove takes technique and attention to detail. Follow the steps in this article to relace your glove correctly. Keeping it in good condition is important for peak performance. Gather the materials and tools mentioned earlier. Then start to remove the old laces, being careful not to damage the leather. Choose the type and color of lace for the desired look and durability. As you proceed, keep an even tension on the loops. Secure the knots at the end of each lace.
Let’s dive into an interesting history lesson. Did you know that early baseball gloves weren’t as padded or advanced? In fact, they used to catch barehanded before gloves became accepted in the late 1800s. Innovations in materials and design have led to more advanced and protective gloves.