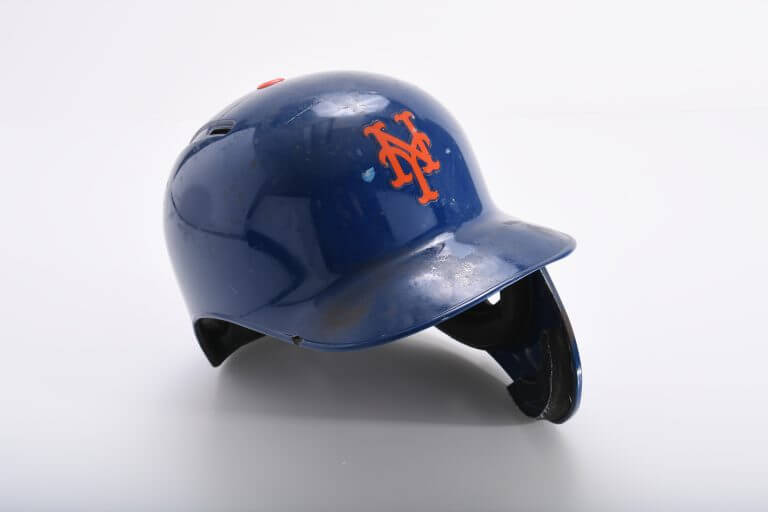
Painting a baseball helmet allows for creative personalization and customization. By painting their helmets, players can express their individuality through unique designs and color schemes. This can help build team spirit and morale. Painting also enables matching team colors that aren’t available from manufacturers. It provides an affordable way of fixing scratches, chips or faded colors on older helmets to make them look like new again.
Overall, a customized painted helmet can become a representation of the player’s personality and love for the game.
Prepare the Helmet
Before painting your baseball helmet, it’s important to properly prepare the surface. This will help the paint adhere better and lead to a smoother, more professional looking finish.
First, clean the helmet thoroughly with a degreasing agent like dish soap and water. This removes any dirt, grease or oil. Next, use a plastic scraper to remove any decals or stickers from the helmet. Be careful not to scratch or gouge the helmet surface. If the adhesive remains, use a remover like Goo Gone to get rid of any sticky residue.
Once the helmet is clean, sand down any rough areas or paint drips from previous coats using 220 grit sandpaper. Don’t sand too aggressively as you don’t want to remove the original paint if possible. Fill any dents, chips or cracks with a thin layer of plastic filler, allow it to fully cure, then sand smooth.
Proper surface prep ensures the paint will adhere properly for a durable, long-lasting finish. Now the helmet is ready for your custom paint job.
Choose Your Paint
When choosing paint for a baseball helmet, the two main options are acrylic and enamel paints. Acrylic paints are water-based and provide good flexibility and durability for a helmet. They adhere well to plastic and metal surfaces. Acrylics are also easier to clean up with just soap and water. Some popular acrylic paint options suitable for helmets include Krylon Fusion and Rust-Oleum Plastic Spray Paint.
Enamel paints provide a glossy, durable finish but require mineral spirits for cleanup. Enamels may chip more easily than acrylics when a helmet is dropped or hit by a ball. Enamels also contain solvents that require proper ventilation during application. However, enamels provide vibrant, glossy colors that stand out.
When deciding between acrylic and enamel paint, consider the venting needed for enamels and the cleanup required. Acrylics tend to adhere better and resist chipping on helmets. If you need a glossy color, enamels can provide that effect. Test paint options on helmet sample areas before fully committing to a paint type.
Prepare the Paint
Acrylic paints are a popular choice for painting baseball helmets because they adhere well to plastic and dry fast. However, acrylic paint right out of the bottle can be thick and challenging to apply smoothly. It’s important to properly prepare acrylic paint before painting your helmet.
First, thoroughly mix the acrylic paint before using it. Acrylic paint can separate in the bottle, with binders and pigments settling at the bottom. Use a popsicle stick or other tool to thoroughly stir the paint until it is a uniform consistency. This helps ensure the paint flows and covers evenly when applied.
Next, thin the acrylic paint with water or acrylic medium for optimal consistency. Generally a ratio of 60% paint to 40% thinner is a good starting point. Adding thinner improves the flow and surface finish of acrylic paint. Test the consistency on a piece of paper – the paint should flow smoothly without being overly watery. Add additional water or medium as needed to achieve a milk-like consistency.
Properly mixed and thinned acrylic paint will glide onto the helmet surface and self-level nicely. Taking the time to properly prepare acrylic paint leads to a smooth, professional looking painted finish.
Set up Your Workspace
When painting a helmet or any project, it’s important to set up your workspace properly to avoid messes and accidents. Be sure to work in a well-ventilated area, either outdoors or by an open window. The fumes from spray paint and other products can be strong, so ventilation is key.
Cover any surfaces like floors or furniture with a drop cloth, newspapers, or cardboard to protect from drips and spills. Work on top of disposable material that can be thrown out after like a cardboard box or plastic tarp. Make sure you have a clear, flat surface to place your helmet on while painting.
Elevate your work by placing it on top of cans or boxes so you can access all sides easily. Organize your paints, brushes, clean water, rags, and any other supplies you need nearby. Avoid clutter to prevent bumping into things while focused on your painting project. Having a clean, uncluttered, and well-ventilated workspace will set you up for success painting your helmet.
Base Coat
The base coat is your foundation and provides full coverage over the bare helmet surface. Start by applying 1-2 even coats in your main color to build up a smooth, opaque layer. Spray painting works well for the base coat since it goes on lightly and dries quickly, allowing you to layer coats.
Make sure to follow the manufacturer’s instructions for proper spray technique – hold the can 6-8 inches away and apply light, even passes over the surface to avoid drips and runs. If brush painting, use long, smooth strokes and allow each coat to dry thoroughly before adding another.
Whether spraying or brushing, take your time with the base coats for best results. The base should fully cover the helmet surface while still allowing any underlying graphics to show through. Once your smooth base layer is complete, you’ll have the perfect foundation for adding details and designs.
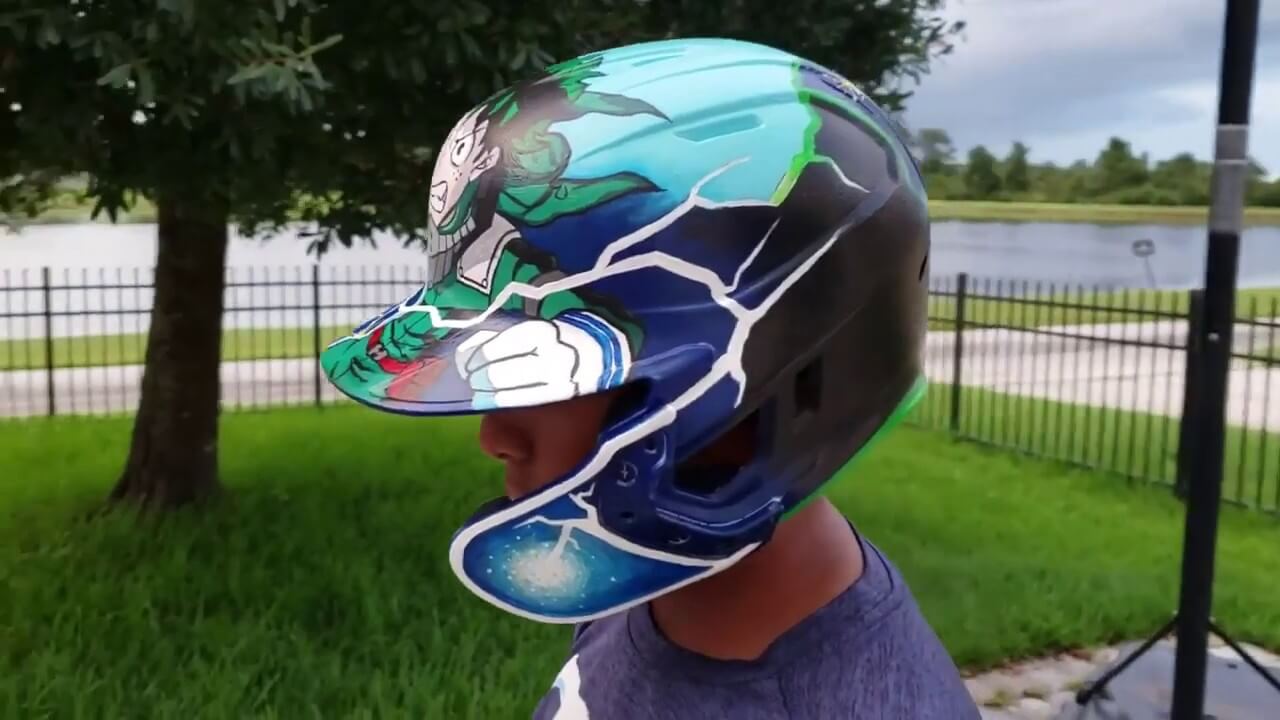
Detail Work
After the base coat has fully dried, it’s time to paint the small details like stripes, logos, and numbers. Use a small round brush and steady hand for the intricate detailing. Trace any designs lightly in pencil first if needed. Apply 2-3 thin coats of paint to get full coverage on the details, allowing each coat to dry in between. Acrylic paint pens can also be used for adding details and accents in a different color after everything else is painted.
When painting details like numbers and letters, use painter’s tape to mask off sharp edges for clean lines. Remove the masking tape immediately after painting before the acrylic dries. Refer to reference images as needed when painting logos and graphics. Take your time on the detail work to get crisp, sharp designs. Allow the details to dry fully before moving onto clear coating to seal the helmet.
Clear Coating
The clear coat is an essential step that seals and protects the paint, while also providing a uniform, glossy finish. After finishing the decorative paint work, apply 2-3 even coats of clear coat, following the directions on the spray can. Allow each coat to dry fully before applying the next. The clear coat fills in any tiny cracks and creates a smooth surface. Apply the coats lightly, avoiding runs. Multiple thin coats are better than one thick coat.
The number of coats needed may vary based on the helmet shape. Make sure the clear coat is even across the entire surface of the helmet. Avoid over-spray on the interior padding if possible. Let the clear coat cure fully, which can take 72 hours or more, before using the helmet. The clear coat locks in the paint and protects the helmet from chips, fading, and the elements. With proper prep and application, a clear coated paint job can last for many years of active use.
Troubleshooting
Painting a helmet can be tricky, and problems can arise even if you carefully follow each step.
Here are some common issues and how to fix them:
Fix drips or rough spots – If you end up with drips, bumps, or uneven coverage, wait for the paint to fully cure first. Then, lightly sand the area with fine grit sandpaper to smooth it out. Be gentle and careful not to scratch too deep. Afterwards, clean off any dust and paint another thin layer to cover the sanded area.
Paint not curing – Certain conditions like high humidity can prevent paint from drying properly, leaving it tacky. Try moving the helmet to a warmer, drier area. A dehumidifier and fan can help circulate the air. If it’s an issue with the paint itself, you may have to lightly sand and reapply. Make sure to use fresh paint that hasn’t been left open.
Colors not matching – When painting details, the new color may not blend well with the base. To fix this, thin the detailed paint and lightly apply it over the border between the two colors. Softly feather and blend the paints together. Adding a wash or clear coat afterward can also help blend the colors.
Brush strokes showing – Visible brush strokes often happens if the paint was applied too thickly. Sanding lightly can remove some of the texture. Next time, ensure paint is thinned properly and applied in smooth, even coats.
Caring for Your Painted Helmet
After spending the time and effort to paint your helmet, you’ll want to make sure it lasts.
Here are some tips for caring for your painted helmet:
-
Proper storage when not in use is important. Store the helmet in a cool, dry place out of direct sunlight. The temperature fluctuations and UV rays can negatively impact the paint over time.
-
Clean regularly with soap and water. Avoid harsh cleaners or chemicals which could strip the paint. A soft cloth dampened with mild soap and water is ideal for wiping away dirt and sweat.
-
Inspect for cracks or chips. As you wear and use the helmet, periodically check for any chips or cracks in the paint. Touch up these spots to prevent exposing the bare helmet underneath.
-
Reapply clearcoat annually. Clearcoats protect the underlying paint and graphics. Over time they can wear down. Lightly sanding and reapplying a clearcoat about once a year will maintain that protection.
-
Handle with care. Be careful not to drop or bang the helmet around. The impact can chip paint and damage the helmet. When not being worn, store it properly in a bag or on a helmet stand.
-
Consider professional periodic refurbishing. Many sporting goods stores offer helmet reconditioning services every 1-2 years. This involves a deep cleaning and inspection, repainting any major chips, and reapplying graphics/logos.
Properly caring for your painted helmet will help the job last for multiple seasons of play and look great.